Tuesday, March 24, 2015

How to Setup New VPS Server in Godaddy


Types of Web-Hosting :

The three major categories of web hosting are "Shared Web-Hosting, Virtual Hosting and Dedicated Hosting".


Shared Web-Hosting :- The users website is placed on the same server as that of many others. As the name indicates, all the existing domains on the common server will share a common pool of resource like the RAM and CPU. 


Virtual Web-Hosting:- This is also referred to as Virtual Private server (VPS). This method of web hosting divided the available resource into separate Virtual Server in such a way that there is no change in the underline hardware. The user will have to take care of their own server and see to its proper function and maintenance. It is like you are responsible for your space in that large server, which is the house of many others like yours. 


Dedicated Web-Hosting:- The user get a full server for his/her own. In other words, there is no sharing in this type of web hosting and the server is totally dedicated to a single user. Since, an either server is being allocated to a single user, the costs of this type of web hosting are very high but it has high flexibility.

First, we should have an account on godaddy.com. Then we need to purchase suitable plan (Shared Server, VPS or Dedicated Server). Here I purchased VPS server.

Step 1 - Login to godaddy account using your user name and password.
  
Step 2 - After login, Go to "My Account" and check the purchased product details. Here, we can see the purchased products.

Step 3 -  Now we want to go to "Server" section for configuring new VPS server. In Server section, click on "Manage".

As we are using it first time, when we click on Manage tab, we will get a screen as shown below. Here, we need to enter the server credentials and select the Data Center / Location then click on "Create Server".

Step 4 - After creating server, we can see the server droplet. We have to go to server dashboard and click on "Server Name or Droplet" (chatonfleek).

When we enter into server dashboard, we can see the server "Details, Cpanel and History". In "Setting", we can edit and modify password and server name and also we can destroy the server here.

Step 5 - Now we are going to create WHM and Cpanel account for managing server graphically / user-friendly.
   WHM    => Root level management  Port Number 2086
   Cpanel  => User level management  Port Number 2083

After click on "Create with WHM", we will get a WHM configuration window and click on "Save Settings".

This configuration will automatically set all default settings and it will be automatically redirected to WHM dashboard. Here, we can see the all configuration section.

Step 6 - WHM successfully installed on your server. Next we need to create Cpanel account for hosting Domain (shyam.com).

Step 7 - Next step is to check the newly configured Cpanel account on WHM. Here, click on Cpanel symbol and it will be redirected to Cpanel account.

Step 8 - We can check this domain account on browser "http://IP-Address/~User-Name" of the Domain, for example "http://192.168.0.1/~shyam".

Note : We can use fully qualified domain name (shyam.com) on browser. But before using domain name, we have to point Domain Name to Server. Then only we can use the domain name globally.

That's it...

Saturday, March 14, 2015

How to point Domain Name to VPS Server


Step 1 -  Login to the purchased Domain Name control panel.


Step 2 - Go to My Account Section, we can see our purchased product. Then select Domain Name => Manage.

Here, select which Domain you want to check and modify. Go to Setting => Check Domain details for NameServer and Hostname.


Step 3 - We can also check domain detail on internet. Here I am using this site.

Step 4 - Go to VPS server Control Panel/WHM and check the NameServer details.

Go to DNS Functions => NS Record Report. Here, we can see the default NameServer & IP.


Note : In this case, I am configuring NameServer globally on this server.

Step 5 - Now we need to create new Cpanel account on this server, then only we can globally configure NS on this server.

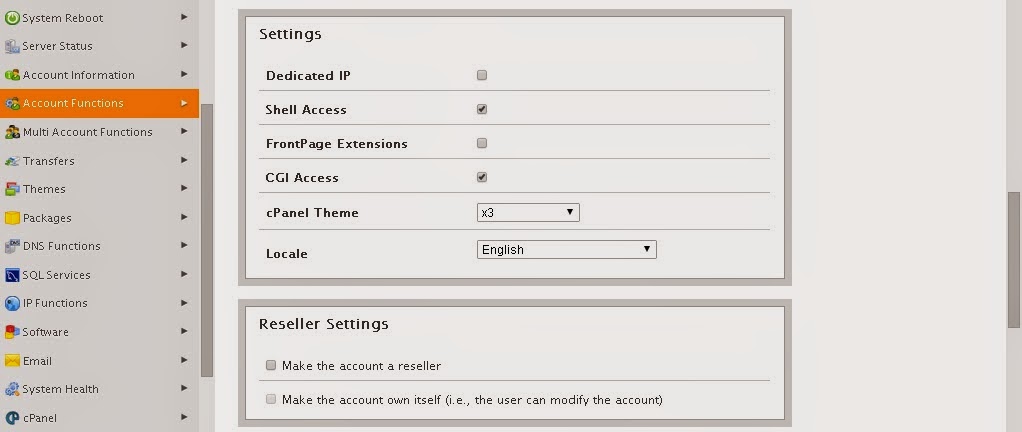
Go to WHM => Account Functions => Create a New Account.

Here, fill the information about Domain details for the cpanel account => Create

Note : When we create new account, there is an option to "use the nameserver specified at the domain registrar".

Step 6 - Now check the Cpanel account is created or not in WHM. Account Information => List account.

Here, we can see the new account is created. This account is automatically created in DNS zone file under DNS Functions.

Step 7 - Go to DNS Setting for changing or creating own Nameserver on this server. DNS Fuctions => Edit Zone => Here we can see the created domain name => Select the Domain name.

Here we can see the DNS Zone file information. We have to modify the details for changing SOA , NS1 NS2 and Add A record  and save.


Step 8 - Now we added our Nameserver and A record on DNS zone file. We need to assign the NameServer and IP to make it globally. Go to Server Configuration => Basic Cpanel & WHM Setup.

Here, select "All" option and go to bottom of the page and assign the NamesServer and IP address.

Step 9 - We need to check the Domain details for back-end, through this option, we are checking only Nameserver. Before editing both the files, backup the files for safety.

1st Check /etc/wwwacct.conf  => NameServer is added correctly or not. 


2nd Check the /var/cpanel/nameserverips.yaml => Sometimes the nameserver will not be added automatically, then we need to manually change this Nameserver and IP.


Step 10 - After completing the configuration, just check the Nameserver on WHM.
DNS Functions => NS Record Report. Here we can see the Nameserver and IP

Step 11 - Next, go to Domain control panel and Domain settings. 
  
1st change the host name. In bottom of  the page, select Host Name => Manage => Add Host name => Save

2nd Change Nameserver => Go to Name Server => Manage => Select Custom => Add NameServer (NS1 NS2) => Save
Here, We can go for default configuration by selecting "standard" option.

Note : Domain Name Pointing will take propagation time of 72hrs/48hrs. Sometimes it may take only 2hrs/4hrs.

Step 12 - We can check the Domain Name changed or not in online using this site http://www.kloth.net/.


In this option, we can identify the domain hosted web server.

Step 13 - Check your domain name / website is working.

Go to browser =>Type your domain name (chatonfleek.com)

That's it.....