For users connecting via tunnel mode, traffic to the Internet will also flow through the FortiGate, to apply security scanning to this traffic.

Step 1 - Check the fortigate version and details, backup the configuration first.

Step 2 - Check the Interface details like LAN & WAN IP and Ports.

=> WAN is my External Network Interface, two WAN "WAN1 & WAN2" connected to a Zone "WAN".
Step 3 - Create an Address for SSL-VPN-Range & Local LAN. Here I have two network connections "CO & BMU", so I have created two address.
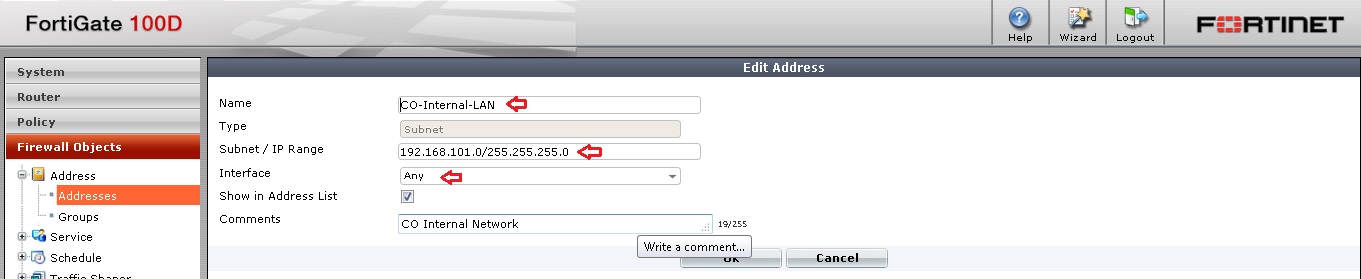

Also create SSL-VPN range to access from remote users.


Step 4 - In my case, as I have two network range, I need to add both network range to one group.


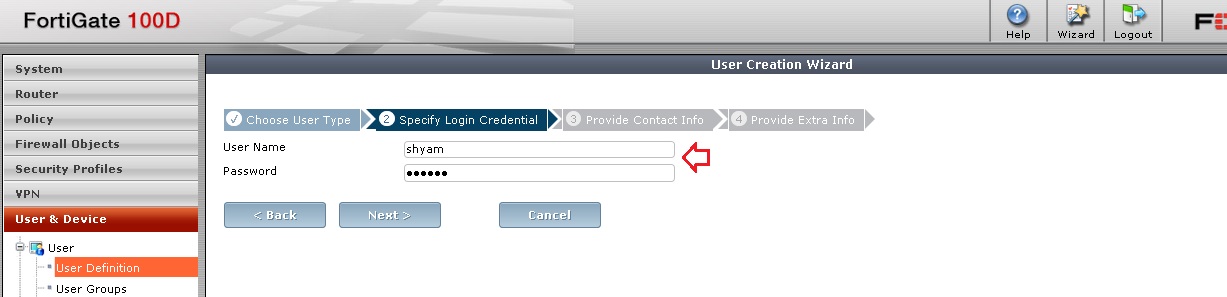
Step 5 - Create a user for SSL-VPN access.


This username and Password will ask at connecting time.


Step 6 - Create a User Group for SSL-VPN access. If we have one or more users in this VPN access, we need to add to this group.


Step 7 - Now we can create SSL-VPN Tunnel.


Step 8 - We need to create policy for accessing Remote location (Home) to CO-Network (Office).


Step 9 - Check the SSL-VPN web tunnel mode using browser.


Step 10 - Check the connection through FortiClient (Tunnel Mode).


That's it...