Saturday, March 14, 2015

How can I find Server or Server HostName using with Domain Name


In this tutorial, we can find server name to which the Domain or Website is pointed. 
Here, we have only Domain name. 

Step 1 - Check the Domain name / Website is working or not.

Step 2 - Go to the online site "www.kloth.net" or "https://who.is/whois/" for checking the Domain details, here I am using "www.kloth.net".

First check the domain name details : Go to "whois" option => Enter the Domain Name.

Here, we can see the Domain details like Nameserver, Registrar, Purchase date, Expiration, etc..

Step 3 - After that, check "A Record" to find the server to which the domain name is pointed. Go to "Dig" option => Enter the Domain Name.

Here Enter the Domain Name and Select A Record and Go to "Look it Up"

After entering all the details, we can get Domain A Record. This is the Domain pointed server IP.

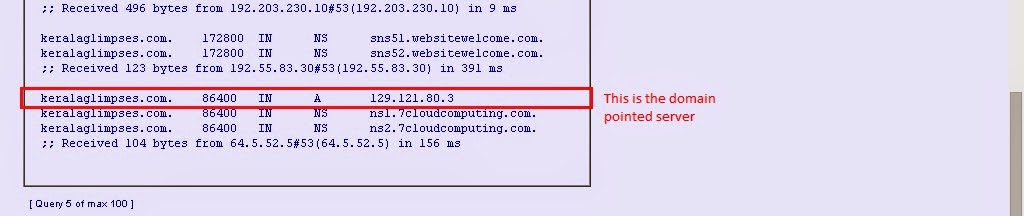
Step 4 - Now we got the "A Record / IP address" for the given Domain name server. We can try to connect the server using "telnet" command.

Go to Run => Command Prompt => Run this Command "Telnet IP-Address 25"

25 is a SMTP port number, we can also use some other server ports like 80, 443 etc..
By this way, we can find only the server name to which the Domain is pointed. 

Step 5 - Now, try to access the server using the hostname in putty.
Note : If you want to access the server, you should have the Username & Password.

That's it.......

Saturday, March 7, 2015

How to install Oracle Java JDK 8 on Centos 6,7


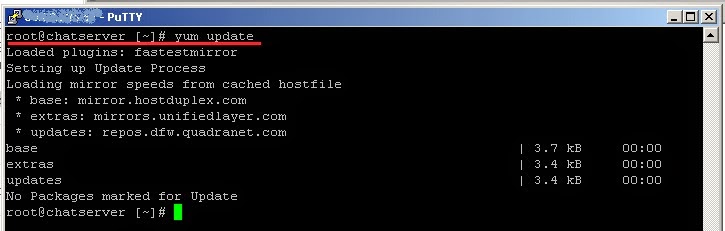
Step 1 - First of all, update your server.

Step 2 - Then, search for if any older JDK versions are installed in your system.

        root@chatserver [~]# rpm -qa | grep -E '^open[jre|jdk]|j[re|dk]'
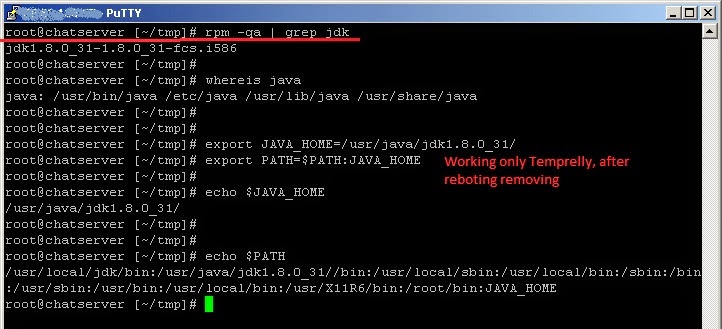
root@chatserver [~]# rpm -qa | grep jdk

Step 3 - To check the already installed Java version, enter the following command:

        root@chatserver [~]# java -version
       -bash: java: command not found

Step 4 - If Java 1.6 or 1.7 have been installed already, you can uninstall them using the following commands.

root@chatserver [~]# yum remove java-1.6.0-openjdk
root@chatserver [~]# yum remove java-1.7.0-openjdk

root@chatserver [~]# rpm -ev jdk-8u31-linux-i586.rpm

Step 5 - Download And Install Oracle Java JDK on you PC

Go to the "Oracle Java download page" and download the required version depending upon your distribution architecture and install the java package or Use "wget".

"wget http://download.oracle.com/otn-pub/java/jdk/8u31-b13/jdk-8u31-linux-i586.rpm"

        root@chatserver [~/tmp]# cd tmp/
        root@chatserver [~/tmp]# wget http://download.oracle.com/otn-pub/java/jdk/8u31-b13/jdk-8u31-linux-i586.rpm

         root@chatserver [~/tmp]# rpm -ivh jdk-8u31-linux-i586.rpm

Step 6 - Now, check for the installed JDK version in your system using command:

        root@chatserver [~/tmp]# java -version
java version "1.8.0_31"
Java(TM) SE Runtime Environment (build 1.8.0_31-b13)
Java HotSpot(TM) Client VM (build 25.31-b07, mixed mode, sharing)

Step 7 - We can easily set the environment variables using the "export" command as shown below.

Note : This method is not recommended. Because, the path will be disappeared when the system reboots.

        root@chatserver [~/tmp]# export JAVA_HOME=/usr/java/jdk1.8.0_31/
root@chatserver [~/tmp]# export PATH=$PATH:JAVA_HOME

Step 8 - Now, let us check for the environment variables using commands:

root@chatserver [~/tmp]# echo $JAVA_HOME
/usr/java/jdk1.8.0_31/

root@chatserver [~/tmp]# echo $PATH
/usr/local/jdk/bin:/usr/java/jdk1.8.0_31//bin:/usr/local/sbin:/usr/local/bin:/sbin:/bin:/usr/sbin:/usr/bin:/usr/local/bin:/usr/X11R6/bin:/root/bin:JAVA_HOME

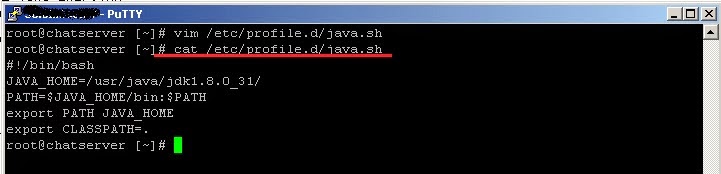
Step 9 - To make it permanent, you have to add the paths in the system wide profile.To do that, create a file called java.sh under /etc/profile.d/ directory.

        root@chatserver [~]# vim /etc/profile.d/java.sh
#!/bin/bash
JAVA_HOME=/usr/java/jdk1.8.0_31/
PATH=$JAVA_HOME/bin:$PATH
export PATH JAVA_HOME
export CLASSPATH=.

Step 10 - Make it executable using command:

         root@chatserver [~]# chmod +x /etc/profile.d/java.sh

Step 11 - Then, set the environment variables permanently by running the following command:
root@chatserver [~]# source /etc/profile.d/java.sh

That’s it......

Tuesday, February 17, 2015

How to Setup PHP Cron Job on Cpanel


A cron job is simply a task that you schedule to run automatically at specific intervals. For example, if you want to back up a file every six hours, you can set this up easily using cPanel's cron jobs feature.

Step 1 - Login to Cpanel account


Step 2 - Go to bottom of the page and select "Cron Job" Option.


Step 3 -  Click on "Cron Job" Option, we can see the configuration section.


Step 4 - Update your E-mail Address, so that you can get the updates of Cron Job running output.


Step 5 - In Common Setting, either you can select the default configuration or you can set time schedule manually.

Note : In command section, as we are using PHP script, we must use PHP in command option with absolute path.


Step 6 -  Finally, check the Cron Job is working as per the specified time schedule. We can also check updated mail account.

That's it......

Sunday, January 18, 2015

How to install and configure PSI chat client for Openfire Server


Openfire is a powerful instant messaging (IM) and chat server that implements the XMPP protocol.
To connect to Openfire you need to download “PSI” client software or any other chat clients like spark, pidgin, etc.. and install in your system.

You can install and configure it in your own style. Here I am using PSI chat client, the advantage of  which is that we can add more options.

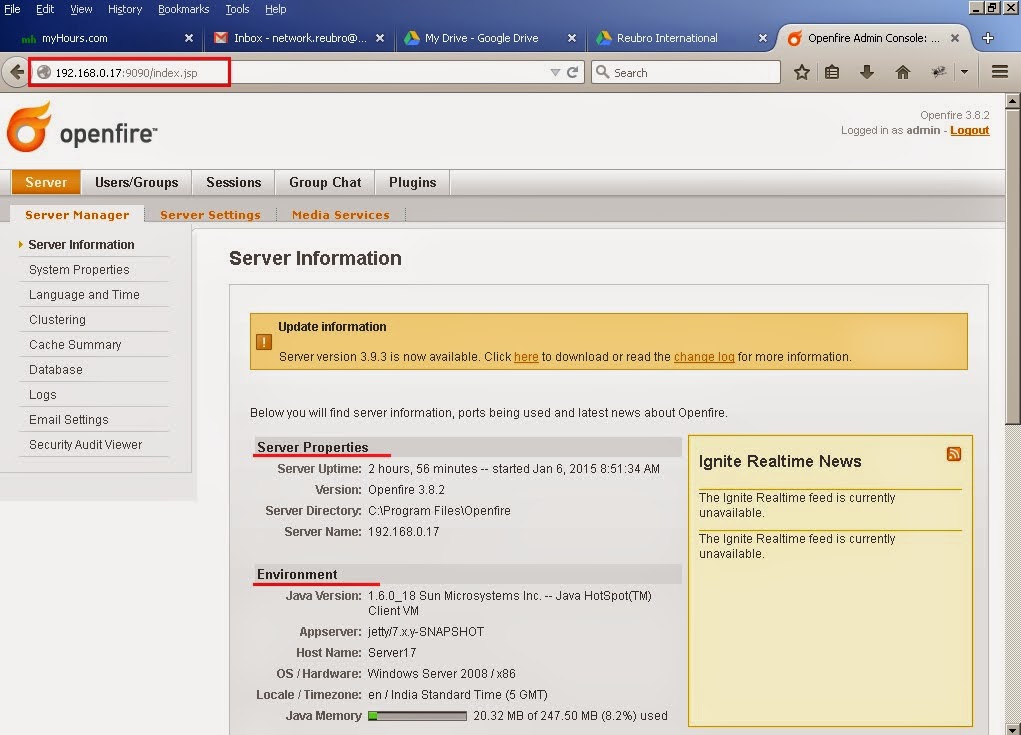
Step 1 - Log in to openfire chat server check the server details.


Step 2 - Now we need to create a user account. Go to User/Group => Create New User and Enter the user details.


Step 3 - I have already installed PSI chat client in my PC. You can use the below mentioned url to see the installation guideline.

http://itinformation-shyam.blogspot.in/2015/01/psi-chat-client-installing-on-windows.html

Step 4 - After installation, open PSI chat client in your client PC.

Note : Here, select Profile as "Default" for adding registered user account in PSI.


Step 5 - Add registered user account already created in openfire server. This option is to be done only for first time. Go to General => Account Setup =>Add


Note :  We can also Register new User Account in openfire server by selecting "Register new account" in 'PSI Add Account' window.

In Next  window, Jabber ID will be : Username @ Server IP.

Step 6 - Then, we can see the added account in Jabber Account list as shown below:

Step 7 - Now login with  the user account in PSI. At the time of time login, accept the certificate and publish.


Step 8 - Send friend request to all users in the server.

Note  : In PSI, we can send friend request to all users in a single click.


Step 9 - Now login is completed successfully and  chat with friends.

That's it.....

Friday, January 16, 2015

PSI chat client installing on windows PC


Psi is a free instant messaging application designed for the XMPP network (including Google Talk). Fast and lightweight, Psi is fully open-source and compatible with Windows, Linux, and Mac OS X. To connect to Openfire you need to download “PSI” client software and install on your system.

Step 1 - Download PSI chat client from Internet.

Step 2 - Install PSI client from downloaded folder.


 Step 3 - Next,  you can see welcome wizard scree, Click Next.

 Step 4 - Agree the license agreement, Click I Agree

 Step 5 - Choose the PSI components, Click Next

 Step 6 - Choose the installation location, Click Install

Step 7 - Installation completed, we can run the program now. Click Finish

Step 8 - Open PSI, select profile as "Default" then click Open.


Here we can Create/Register a User Account.

That's it...