Wednesday, December 21, 2016

How to install and configure Zentyal 4.2 server


Zentyal server is a an alternative for Microsoft Server, it is Ubuntu based Small and Medium Enterprise Server. The latest stable version of Zentyal is build upon Ubuntu 14.04 LTS. Zentyal can be used as File/print Server (SAMBA 4), Mail server, it supports Exchange Server, Microsoft Outlook 2007,2010 and 2013 as well, it Provide interoperability among Linux and Microsoft Active Directory.


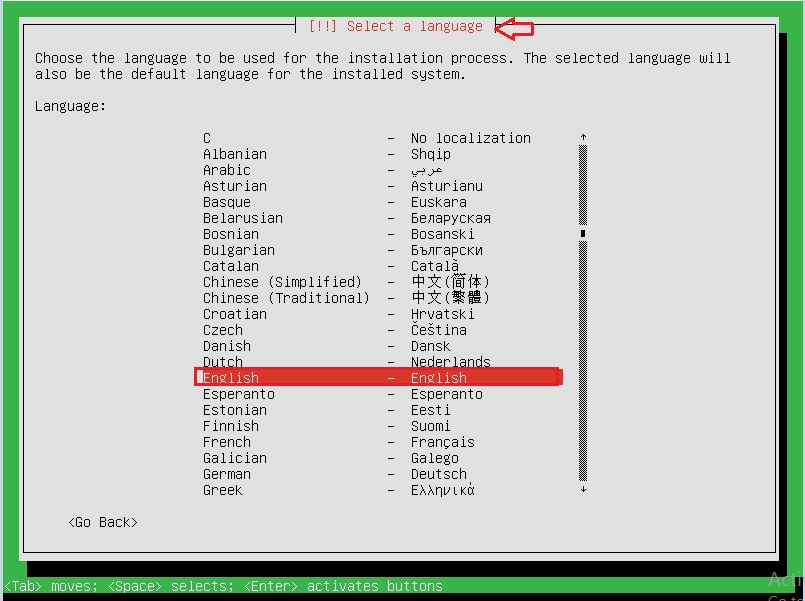
 Step 1 - Boot the system with DVD/USB and Select the installation language as English.

Step 2 - Two types of installation methods are here, I am selecting Expert mod.


You can install Zentyal by using the default mode which deletes all disk contents and creates the partitions required by Zentyal by using LVM or you can choose the expert mode which allows customized partitioning. Most users should choose the default option unless they are installing on a server with RAID software or they want to create special partitioning according to specific requirements. Using the expert mode you can also choose to perform a headless installation (without local desktop environment).

Step 3 - Choose language to be used for installation procedure.
Step 4 - Select your location, it will support time zone selection purpose.

Step 5 - Configure Key Board, here I selecting NO

Step 6 - Please select the country language here, I select English(US).

Step 7 - Configure the Host-Name.

Step 8 - Create new user account for login purpose

Step 9 - Time zone configuration as per our country location automatically selected.

Step 10 - Choose the partitioning method, here I choose "use entire disk" it will create automatically.

Step 11 - Graphical or Remote access we needed, then choose "NO", so we can access graphically.

Step 12 - Starting installation process.

Step 13 - Configure the package manager without using proxy settings.

Step 14 - Install the GRUB option if it is main OS. Otherwise old one is modified.

Step 15 - Finish the installation steps.

Step 16 - After complete the installation steps, start the OS and check the IP details.


Step 17 - After checking the IP, access with that IP and configure the initial setup. Here I am configuring from Remote PC.
 

Step 18 - In the Initial setup, we need to configure Interface Type, here I choose eth0 is LAN.

Step 19 - Select the server type, this server is primary DC (Domain Controller), so I have selected Standard and start the configuration.
 
When modules will get loaded, a dashboard will appear, on left hand side a of dashboard a list of panels will be visible, with a list of DNS, DHCP , VPN, LTSP, MAIL, Domain Services etc. Now you are able to utilize zentyal platform for various services as per your need. You will be able to monitor network status, running services, updates available or current DHCP Lease directory from dashboard etc.


That's it...

Tuesday, September 6, 2016

Install GoDaddy SSL Certificate using WHM/Cpanel/Apache Server


In order to install an SSL certificate, the domain (or the sub-domain) always needs to have its own dedicated IP address. Unless you have a root access to the server, you will need to ask your hosting provider to do this for you.

Types of SSL Certificates :

1. Extended Validation - The latest, and possibly most significant, advancement in SSL technology since its initial inception follows the standardized Extended Validation guidelines.


2. Organization Validation - GlobalSign has been issuing organization validation Certificates for 15 years. Companies applying for OrganizationSSL have their company details vetted before issuance.

3. Domain Validation - DomainSSL Certificates are fully supported and share the same browser recognition with OrganizationSSL.


Step 1 - First, check the Domain Name is working with http or https.

Step 2 - In my case, I have purchased SSL from godaddy and login to godaddy account.

Step 3 - Go to "My Account" tab, here we can see purchased products.

Step 4 - Go to "SSL" option and click "Set Up" for activating SSL.

Step 5 - After set up SSL configuration, we can see that the "Set Up" option changed to "Launch". Go to "Options", we can see the status. It will take some time for activating SSL validation.

Step 6 - After activating, Go to "Launch", it will be directed to certificate control panel and click on "Set Up".

Here, Select the Domain Name and click on "Request Certificate".

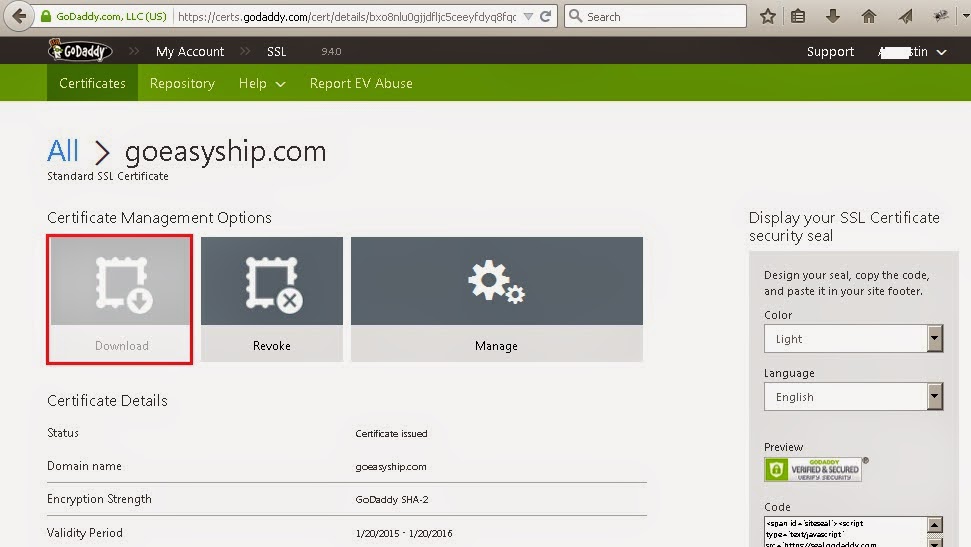
Step 7 - After verification completed, we can see the domain name is issued. Go to "View Status". Here we can see "Download and Manage" options.

Note : Here, Download option is disabled, because by default SSL is activated only for website builder. 

We need to activate the Domain Name, for that we have to go to the Server/WHM and generate the "CSR Key" and copy to SSL Control panel.

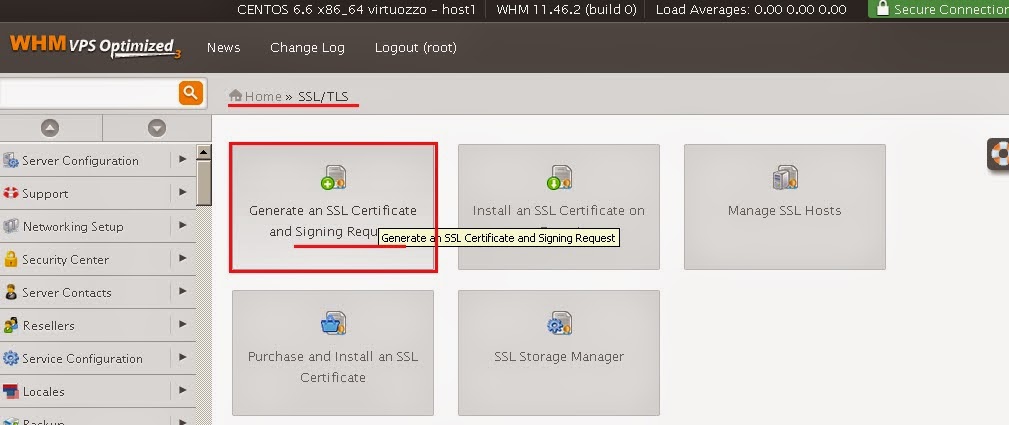
Step 8 - Go to WHM => SSL/TLS => Generate SSL and Signing Request.


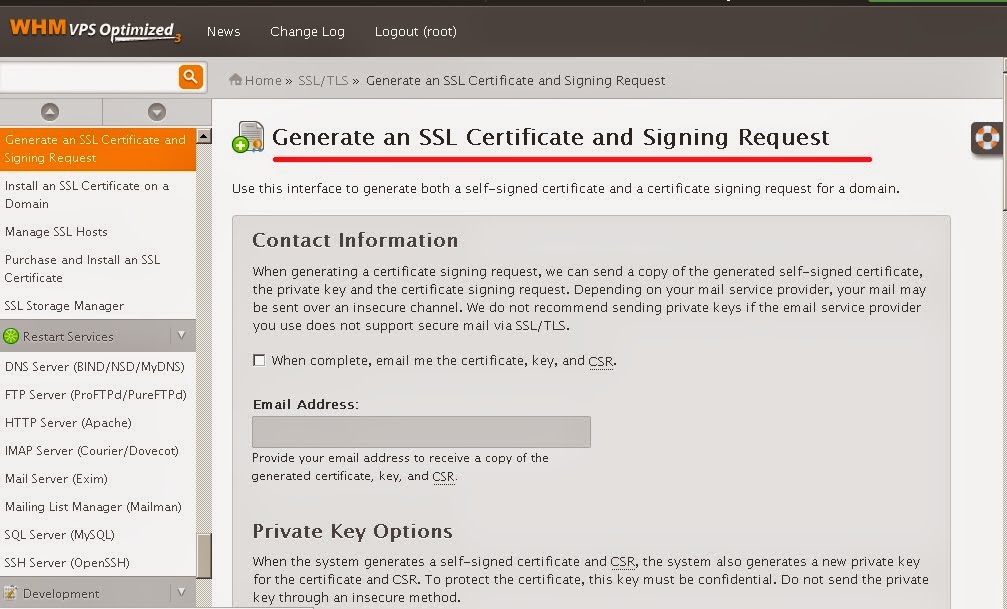
While generating SSL, fill all the required fields and click on "Create".


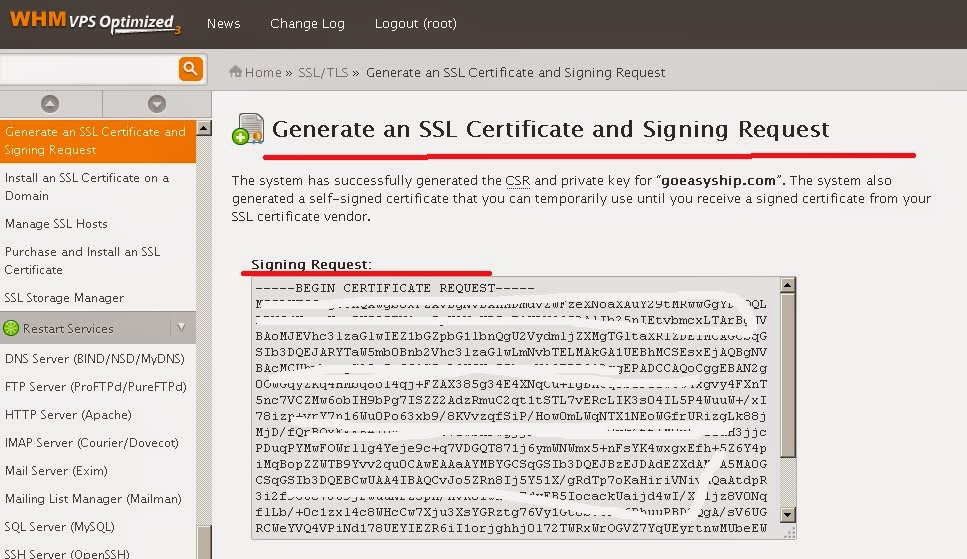
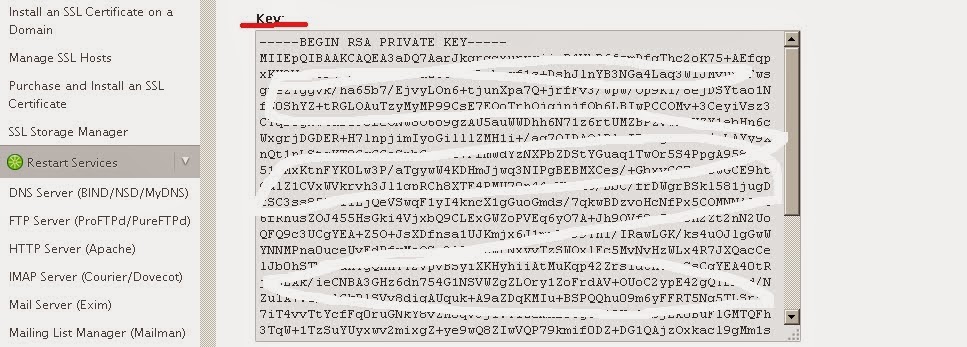
Note : After creating SSL Certificate, we can see the encrypted Key.

Step 9 - Copy the Signing Request/CSR Key from WHM and Go to godaddy account => SSL => Launch => Manage Certificate => "Re-Key certificate" option and paste the CSR Key and Save

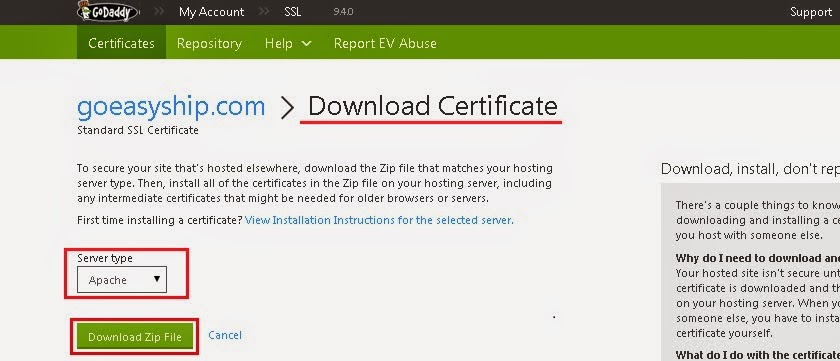
After that we can see the Download option is enabled. Now, we can download CSR Key from godaddy account. Select server type : here I am selecting "WHM/Cpanel/Apache".

Note : We can download CSR Key bundle. Do not delete the key after configuration, save it for future use.


After downloading we can see the CSR Key bundle.

Reference URL => https://support.godaddy.com/help/article/5238/installing-an-ssl-certificate-in-apache-centos?countrysite=in

Step 10 - Now we can check the Domain Name is working in "https:".

Step 11 - Go to the website shown below to check SSL is pointed to Domain Name. Here we can also see all the information related to the SSL.

That's it.....

Monday, September 5, 2016

How to install Xubuntu on Oracle VirtualBox 4.3


Oracle VirtualBox you get all the benefits of installing Ubuntu on a virtual machine but without paying for virtualization software like VMware.

1. Oracle VirtualBox that you can download from FileForum. 
2. Ubuntu that you can download from Ubuntu website.

Step 1 - Open Oracle VirtualBox and click on "New" then "Next".

Step 2 - You must type in a name like "Xubuntu" in the "Name" field and select the Type & Version.

Step 3 - Use the slider to allocate RAM memory 512MB is recommended according to Ubuntu. If you want better performance please provide 1GB or above then click "Next".

Step 4 - To create the virtual disk partition for Xubuntu, it should be at least 5GB per Xubuntu recommendations.

Step 5 - Select Hard disk file type which you want to use.

Step 6 - Select the storage option, we can use both options depending on our requirement.

Step 7 - Allocate the storage size and path.

Step 8 - Server configuration completed, now click on the start button for Power ON. 

Step 9 - Before installing, we need to change some settings. Go to Virtual Mahican settings.

Step 10 - Now go to system section and change the boot order. If we are start from CD, first priority select to CD/DVD.

Step 11 - Go to Network section, we can see the network configuration set to NAT. Then work only Internet connection. 

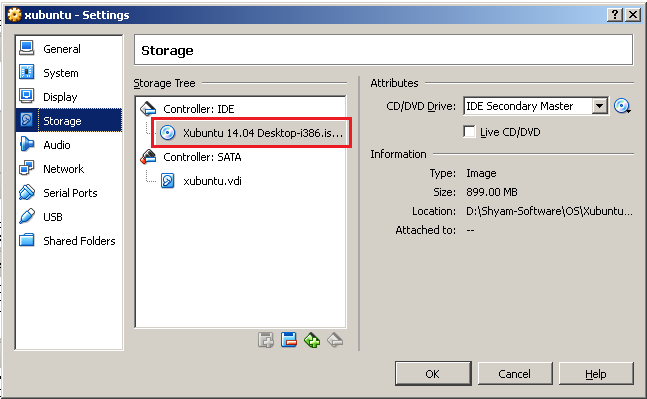
Step 12 - Go to storage section and check the media. Here we need to select where from boot the image "CD or ISO.

Step 13 - Now start the Virtual Mahican and install Xubuntu.

That's it...