PhpMyAdmin is web-based client written in php for managing MySQL and MariaDB databases. It provides a user friendly web interface to access and manage your databases.
Before installing and configuring phpmyadmin, we need to installing and configuring apache, mysql/mariadb and php.
Step 1 - Before Installing phpMyAdmin, we need to Install/Enable "EPEL or REMI" repository.
EPEL => rpm -ivh http://ftp.jaist.ac.jp/pub/Linux/Fedora/epel/6/i386/epel-release-6-8.noarch.rpm
REMI => rpm -Uvh http://rpms.famillecollet.com/enterprise/remi-release-6.rpm
Step 2 - Update repository and install the package using the below command.
[root@proxy ~]# yum check-update
[root@proxy ~]# yum --enablerepo=remi install phpMyAdmin
Step 3 - Now restart httpd service
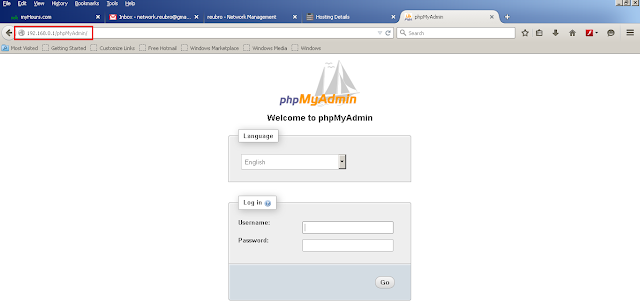
Step 4 - Now, we can access phpMyAdmin in browser using the following url. http://192.168.0.1/phpMyAdmin
Step 5 - phpMyAdmin by default allowed to access from localhost only. If you want to make it accessible from remote computers edit "/etc/httpd/conf.d/phpMyAdmin.conf" and update all 127.0.0.1 with your network OR find the lines “Deny from All ” and comment those lines.
Step 6 -After changing configuration, restart httpd service
Now we can check that it is working fine.
Troubleshooting :
# 2002 – Can’t connect to local MySQL server through socket ‘/var/lib/mysql/mysql.sock’ (2) => The server is not responding (or the local server’s socket is not correctly configured).
( This means your mysql server service is stopped , you must start the service “service mysql start”).
That's it...


No comments:
Post a Comment