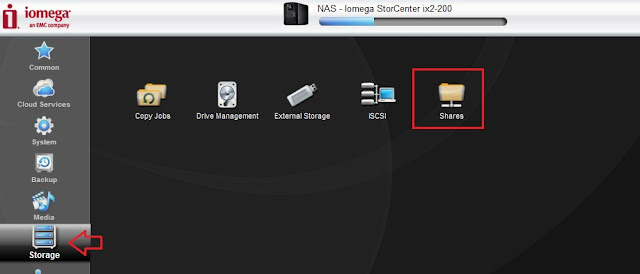
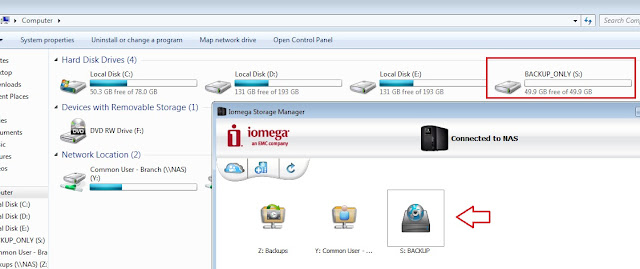
Step 1 - First we need to install Omega Store manager software on our local system. After that, open the software and connect NAS on LAN System. At that time, we can see that it is automatically detected.
Step 2 - After detecting, we can see the storage partition. Backup is default partition.
Step 3 - If you want, you can map the default Backup drive on your computer.
Step 4 - Next, we need to configure the NAS storage. For that, go to settings, it will automatically redirect to browser.
Step 5 - First we want to configure the Network.
Step 6 - After that, configure the Date & Time.
Step 7 - Configure the Security option for Authentication purpose. Here, we can create new user and password. Default Username and Password may be ADMIN.
Step 8 - When we access next time, it will ask for authentication. If you want to change any settings you should know the username & password.
Step 9 - We can create additional users for login.
Step 10 - The below step is, we can configure and link to Active directory and access the storage using AD user level authentication.

If we need to sync Active Directory, go through this step.
Step 12 - Create Users & Group. In my case, I have linked to AD, so that I can select users from AD. First we need to sync the NAS to AD and then we can see the user & group listed from AD.

Step 13 - Now we can create new share folder. Also add the users from the AD, for example, Department or branch wise.

Step 14 - The below tab, we can see all the features of Iomega Storage.
That's it...


This comment has been removed by the author.
ReplyDeleteNowadays, you will find lots of websites but to get a genuine one, you need to visit retail giants.For electronic components, I usually buy from Amazon, BuyKingston, and Maplin. These are the websites I like the most when it comes to buying electronic components.
ReplyDelete