Thursday, April 21, 2016

How to activate Windows 7 & 8 Using CMD


To enter your MAK on Windows 8 and successfully activate, you can complete one of the following steps:

NOTE: You will need the license key given to you when you downloaded Windows 8 from the software page

Command Line option:

Step 1 -  Open administrative level command prompt by typing in cmd on the search tab, right click on the command promt and select Run as administrator.

Step 2 - Type in the following command and hit Enter:
    Example:
    slmgr.vbs /ipk 00000-00000-00000-00000-00000

Step 3 - Click OK on the Installed product key successfully screen.

Step 4 - Reboot the machine and check.


GUI option:

Step 1 - Hit the Windows+R hotkeys to open the Run box and run the following command:

     slui.exe 3

This command will open the following Dialog Box in which you can manually enter your MAK. Enter your MAK in the “Product Key” field, click on the “Activate” button.


That's it...

Monday, April 18, 2016

How to install and Configure MySql Server on Windows system.


MySQL being the world’s most popular open source database, providing great features and being fully supported in Microsoft Windows environment.


Step 1 - Download and install the MySql Server in windows system.


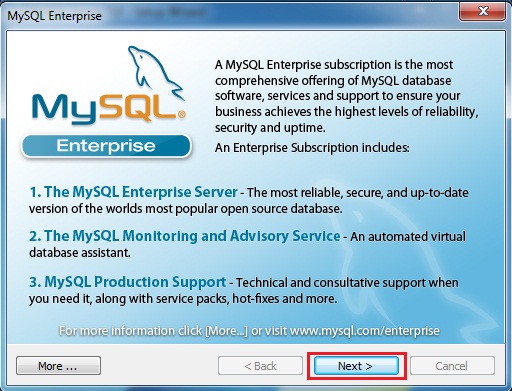
Step 2 - Start the MySql server installation.


Step 3 - If you have selected the checkbox 'Configure the MySQL Server now' in the last step when installing MySQL 5.1, the configuration wizard should start automatically when you click the Finish button. 

Step 4 - Configuration Type:- Select Detailed Configuration here. If this is the only MySQL server installed on your computer.

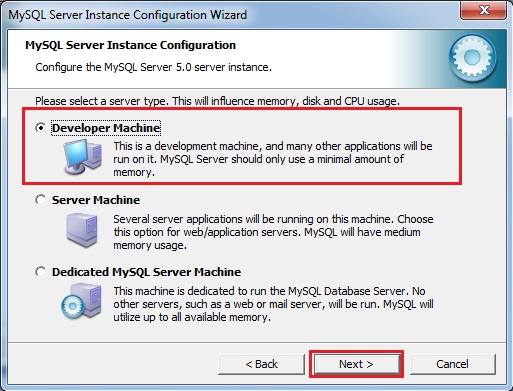
Step 5 -  Server Type:- As this MySQL server is running on a development box.

Step 6 - Database Usage:- Depends on the purpose of your development box, you can select either Multifunctional Database or Transactional Database Only. Here I select Multi-functional Database.

Step 7 - InnoDB table space settings:- InnoDB table type is the storage engine for a transnational database. Use the default settings here.

Step 8 - Database engine's concurrent connections option.Here I Selected Decision Support.

    => Online Transaction Processing (OLTP) as it is the most common use of MySQL server.

    => If the MySQL server on your development machine is used for decision support such as data warehousing or data mining, select the first option.

 Step 9 - Networking options:- By default selection we can use. If port 3306 has been used by another instance of MySQL server, you can select port 3307 or a different port. And also need to enable mysql port on firewall.

Step 10 - Default Character Set:- By default, the Standard Character Set is selected.
 
But you may want to select the second option - Best Support For Multilingualism. This allows our database to store text in many different languages.
Step 11 - Install MySQL server as a Windows service.

You might also want to check Include Bin Directory in Windows PATH if you want to operate MySQL from command line.
Step 12 - Set a new password to the root account. Enter the same password to all three boxes.
Don't select the Create An Anonymous Account checkbox. This can lead to an insecure system.
Step 13 - Now everything is ready to execute, click Execute button.
 

That's it...

Tuesday, March 15, 2016

SARG is a tool that analyses the proxy log files and creates beautiful reports out of it. It is handy to see how much bandwidth is used by individual machines on the network and one can check on which websites the network's users are surfing.

Server Descriptions :

     • Hostname   = proxy.rebro.com
     • Services      = DNS, Squid Proxy and SARG.
     • Eth0           = Connected to Internet  
     • Eth1           = Connected to LAN

Please remember without the Squid and DNS setup, no use of installing sarg on the system it will won’t work at all. Before installing Sarg we must configure DNS and Squid as Transparent Proxy. DNS for the name resolution in caching mode.


Step 1 - Installation of required packages for SARG.

Step 2 - Download SARG package, here I am go to my software folder.

Step 3 - Extract sarg package, using below command.

Step 4 -  Compile SARG package using below Commands.

Step 5 - Now, time to edit SARG main configuration file. It has lots of option to edit you should go through all of them before edit anything. However, we will editing only the ones that we need.

Step 6 - After that restart the service.

Step 7 - Configuring firewall, open port 80 for accessing web server.

      iptables –I INPUT –p tcp –dport 80 –j ACCEPT

Step 8 - Now finally you can generate SARG reports.

The above command will generate reports in mentioned directory "/var/www/html/access_reports" which can be accessed from the web browser using the address http://IP-Address/access_reports

Step 9 - SARG Main Page

Step 10 - To automate the process of generating sarg report in given span of time via cron jobs. For example, let’s assume you want to generate reports on hourly basis automatically, to do this, you need to configure a Cron job.

That's it...

How to mount AWS S3 bucket in linux EC2 instance using S3FS


If you have not created a S3 bucket kindly go through with EC2 documentation.The documentation is very clear and easy to understand .

S3FS is FUSE (File System in User Space) based solution to mount an Amazon S3 buckets. On s3fs mounted files systems we can simply use cp, mv and ls the basic Unix commands similar to run on locally attached disks. 

Step 1 - First, we want to update repository.

Step 2 - Before installing s3fs, we want to install dependencies.

Note : In this section may be we get dependency error like fuse-utils. In this case I have to go below example.

Step 3 - Download and Compile Latest Fuse package first using below command.
URL : wget http://downloads.sourceforge.net/project/fuse/fuse-2.X/2.9.3/fuse-2.9.3.tar.gz
    root@ip-172-31-24-7:~# ./configure
   root@ip-172-31-24-7:~# make
   root@ip-172-31-24-7:~# make install

Step 4 - Now we can install s3fs dependency packages on this server
apt-get install build-essential gcc libfuse-dev fuse-utils libcurl4-openssl-dev libxml2-dev mime-support build-essential libcurl4-openssl-dev

Step 5 - Download and Compile Latest S3FS using below example and extract.
URL : wget https://s3fs.googlecode.com/files/s3fs-1.61.tar.gz

Step 6 - Open /etc/fuse.conf file to make small change. Uncomment the line #user_allow_other.

Step 7 - Now getting the access key and secret key for adding /etc/passwd-s3fs file.

Click on AWS Menu => Your AWS Account Name => Security Credentials.
Here you can see access key and secret key (secret key is visible when you click on show tab). Copy these both keys separately and add on /etc/passwd-s3fs file.

Step 8 - Create a new file under the /etc/ with the name passwd-s3fs and Paste the access key and secret key in this manner => "accesskey:secretkey". And also change the permission.

Step 9 - Now create a directory to mount S3bucket in /mnt directory and mount S3 bucket using below example.
Note: you can get bucket name from S3 management console.

Step 10 -  To check mounted S3 bucket using below command.

Step 11 - We can create file and folder for testing purpose.

Step 12 - Go to AWS S3 bucket control Panel and check the file is there.

Step 13 - Unmount we created S3 bucket and check it.

Note : Here, we unmount the S3 Bucket from the EC2 server. But we can see the file in S3 control panel.

Step 14 - File uploading through AWS S3 bucket directly.

Step 15 - Again we can re-mount and check the files. here we can see we uploaded file.

Step 16 - Check the s3fs status using below commands.

That's it...