Sunday, January 18, 2015

How to install and configure PSI chat client for Openfire Server


Openfire is a powerful instant messaging (IM) and chat server that implements the XMPP protocol.
To connect to Openfire you need to download “PSI” client software or any other chat clients like spark, pidgin, etc.. and install in your system.

You can install and configure it in your own style. Here I am using PSI chat client, the advantage of  which is that we can add more options.

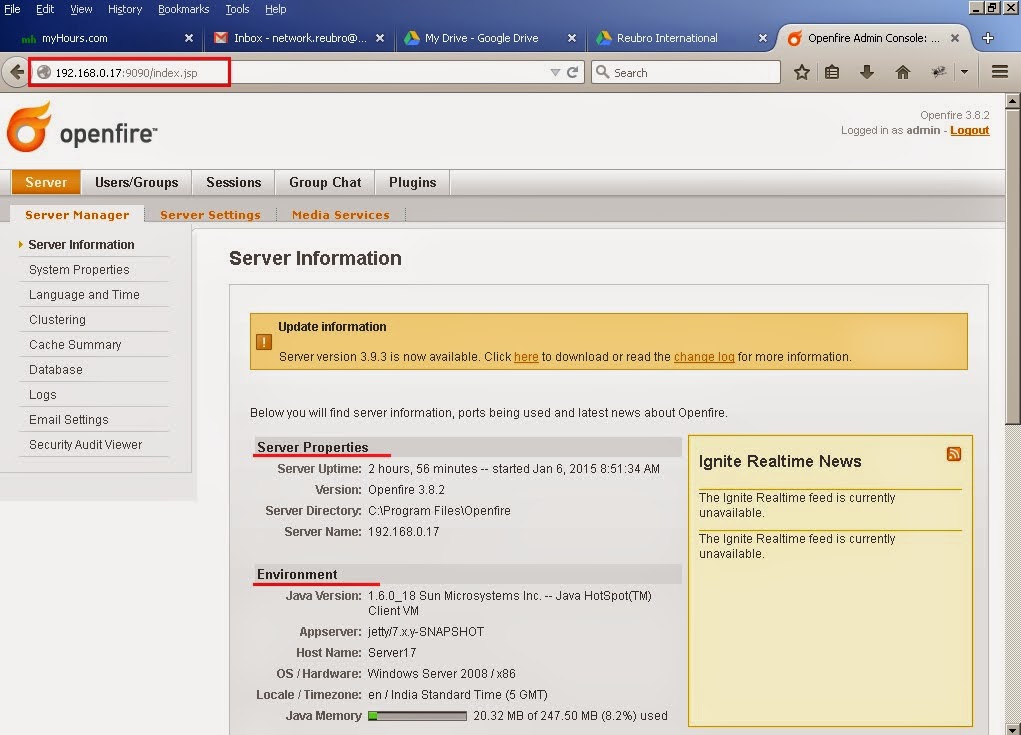
Step 1 - Log in to openfire chat server check the server details.


Step 2 - Now we need to create a user account. Go to User/Group => Create New User and Enter the user details.


Step 3 - I have already installed PSI chat client in my PC. You can use the below mentioned url to see the installation guideline.

http://itinformation-shyam.blogspot.in/2015/01/psi-chat-client-installing-on-windows.html

Step 4 - After installation, open PSI chat client in your client PC.

Note : Here, select Profile as "Default" for adding registered user account in PSI.


Step 5 - Add registered user account already created in openfire server. This option is to be done only for first time. Go to General => Account Setup =>Add


Note :  We can also Register new User Account in openfire server by selecting "Register new account" in 'PSI Add Account' window.

In Next  window, Jabber ID will be : Username @ Server IP.

Step 6 - Then, we can see the added account in Jabber Account list as shown below:

Step 7 - Now login with  the user account in PSI. At the time of time login, accept the certificate and publish.


Step 8 - Send friend request to all users in the server.

Note  : In PSI, we can send friend request to all users in a single click.


Step 9 - Now login is completed successfully and  chat with friends.

That's it.....

Friday, January 16, 2015

PSI chat client installing on windows PC


Psi is a free instant messaging application designed for the XMPP network (including Google Talk). Fast and lightweight, Psi is fully open-source and compatible with Windows, Linux, and Mac OS X. To connect to Openfire you need to download “PSI” client software and install on your system.

Step 1 - Download PSI chat client from Internet.

Step 2 - Install PSI client from downloaded folder.


 Step 3 - Next,  you can see welcome wizard scree, Click Next.

 Step 4 - Agree the license agreement, Click I Agree

 Step 5 - Choose the PSI components, Click Next

 Step 6 - Choose the installation location, Click Install

Step 7 - Installation completed, we can run the program now. Click Finish

Step 8 - Open PSI, select profile as "Default" then click Open.


Here we can Create/Register a User Account.

That's it...

Sunday, January 11, 2015

How to Setup Vsftpd server and Point the Home Directory manually


FTP is used to transfer files from one host to another over TCP network. There are 3 popular FTP server packages available PureFTPD, VsFTPD and ProFTPD. 

If you are login as a normal user, you have to use "sudo" before the command, only for the first time. If your in root login, you can simply use the command, without "sudo".

Step 1 » Update your repositories.
     root@digidom:~# apt-get update

Step 2 » Install VsFTPD package using the below command.
     root@digidom:~# apt-get install vsftpd

Step 3 » Check the vsftpd directories and file paths.
     root@digidom:~# whereis vsftpd


     vsftpd: /usr/sbin/vsftpd /etc/vsftpd.conf /usr/share/man/man8/vsftpd.8.gz


Step 4 » Backup the /etc/vsftpd.con file


     root@digidom:~# cp /etc/vsftpd.conf /etc/vsftpd.conf.back


Step 5 » After installation open /etc/vsftpd.conf file and make changes as follows.

     root@digidom:~# vi /etc/vsftpd.conf

     root@digidom:~# egrep -v '^#|^$' /etc/vsftpd.conf
     listen=YES
     anonymous_enable=NO
     local_enable=YES
     write_enable=YES
     dirmessage_enable=YES
     use_localtime=YES
     xferlog_enable=YES
     chroot_local_user=YES
     allow_writeable_chroot=YES
     connect_from_port_20=YES
     secure_chroot_dir=/var/run/vsftpd/empty
     pam_service_name=vsftpd
     rsa_cert_file=/etc/ssl/certs/ssl-cert-snakeoil.pem
     rsa_private_key_file=/etc/ssl/private/ssl-cert-snakeoil.key

Step 6 » Restart vsftpd service using the below command.
     root@digidom:~# service vsftpd restart


Step 7 » Create a User account with nologin shell and specify Home Directory location, I point to "/var/www/html/" and set the password. You can specify your own path.

Note : Do not delete this account using "userdel -rf mailftp". It will remove html directory, because this user (mailftp) home directory is /var/www/html/. 


  root@digidom:~# useradd -m -d /var/www/html/ -s /usr/sbin/nologin mailftp

  root@digidom:~# passwd mailftp

Options 1 » If you have any doubt in nologin shell, check the login shell.
     root@digidom:~# cat /etc/shells
          # /etc/shells: valid login shells
          /bin/sh
          /bin/dash
          /bin/bash
          /bin/rbash
          /usr/bin/tmux
          /usr/bin/screen
          /usr/sbin/nologin

If not there /usr/sbin/nologin just add for using this command.

     root@digidom:~# echo "/usr/sbin/nologin" >> /etc/shells

Step 8 » Check the user accounts details
     root@digidom:~# tail /etc/passwd | grep mailftp
          mailftp:x:1001:1001::/var/www/html/:/usr/sbin/nologin

Step 9 » Set the permission.


     root@digidom:~# chown mailftp:root /var/www/html/
     root@digidom:~# ll -d /var/www/html/
          drwxr-xr-x  5 mailftp root 4096 Dec 16 22:55 html/

                                  OR


     root@digidom:~# chown root:mailftp /var/www/html/
     root@digidom:~# chmod -R 775 /var/www/html/
     root@digidom:~# ll -d /var/www/html/
          drwxrwxr-x  5 root mailftp 4096 Dec 16 22:55 html/
     
     root@digidom:~# service vsftpd restart

Step 10 » If another option is create a directory inside of html user home directory point this.


    root@digidom:~# useradd -m -d /var/www/html/ftp -s /usr/sbin/nologin mailftp

    root@digidom:~# passwd mailftp

    root@digidom:~# chown mailftp:mailftp /var/www/html/ftp
    root@digidom:~# ll -d /var/www/html/ftp
          drwxr-xr-x  5 mailftp mailftp 4096 Dec 16 22:55 ftp/

    root@digidom:~# service vsftpd restart

That's it............

How to install XAMPP on windows 7


XAMPP stands for Cross-Platform (X), Apache (A), MySQL (M), PHP (P) and Perl (P). It is a simple, lightweight Apache distribution that makes it extremely easy for developers to create a local web server for testing purposes. Everything you need to set up a web server – server application (Apache), database (MySQL), and scripting language (PHP) – is included in a simple extractable file. XAMPP is also cross-platform, which means it works equally well on Linux, Mac and Windows. 


Step 1 - Download XAMPP setup from website:


Step 2 - Disable your anti-virus as it can cause some XAMPP components to behave erratically.

Step 3 - Start the installation process by double-clicking on the XAMPP installer.


Step 4 - For Windows 7 users, you will see a window pop up, warning you about User Account Control (UAC) being active on your system. Click OK to continue the installation.


Step 5 - Next you will see the Welcome to the XAMPP setup wizard screen. Click Next to continue the installation.


Step 6 - Choose the folder you want to install XAMPP. This folder will hold all your web application files, so make sure to select a drive that has plenty of space.


Step 7 - The next screen is a promo for BitNami, an app store for server software. Deselect the ‘Learn more about BitNami for XAMPP’ checkbox, unless you actually enjoy receiving promo mails.


Step 8 - Setup is now ready to install XAMPP. Click Next and wait for the installer to unpack and install selected components. This may take a few minutes.


Step 9 - Installation is now complete! Select the ‘Do you want to start the Control Panel now?’ checkbox to open the XAMPP control panel.


Step 10 - The XAMPP control panel gives you complete control over all installed XAMPP components and tart the apache and mysql.


Step 11 - Test the XAMPP, open your web browser and type in: http://localhost or 127.0.0.1. Select your language from the splash screen.


You should see the following screen. This means you’ve successfully installed XAMPP on your computer.

Step 12 - We will now test whether XAMPP has installed PHP successfully. Open Notepad and type the following into a new document:

     <?php
       phpinfo();
     ?>

Save this file as ‘test.php’ in c:\xampp\htdocs\ (or whichever directory you installed XAMPP in).
Navigate to http://localhost/phpinfo.php. You should see the “Hello World” message


Step 13 - You can access phpMyAdmin by entering http://localhost/phpmyadmin in your web browser.


That's it.....