In order to install an SSL certificate, the domain (or the sub-domain) always needs to have its own dedicated IP address. Unless you have a root access to the server, you will need to ask your hosting provider to do this for you.
Types of SSL Certificates :
1. Extended Validation - The latest, and possibly most significant, advancement in SSL technology since its initial inception follows the standardized Extended Validation guidelines.
2. Organization Validation - GlobalSign has been issuing organization validation Certificates for 15 years. Companies applying for OrganizationSSL have their company details vetted before issuance.
3. Domain Validation - DomainSSL Certificates are fully supported and share the same browser recognition with OrganizationSSL.
Step 1 - First, check the Domain Name is working with http or https.


Step 3 - Go to "My Account" tab, here we can see purchased products.

Step 4 - Go to "SSL" option and click "Set Up" for activating SSL.


Step 5 - After set up SSL configuration, we can see that the "Set Up" option changed to "Launch". Go to "Options", we can see the status. It will take some time for activating SSL validation.


Step 6 - After activating, Go to "Launch", it will be directed to certificate control panel and click on "Set Up".

Here, Select the Domain Name and click on "Request Certificate".


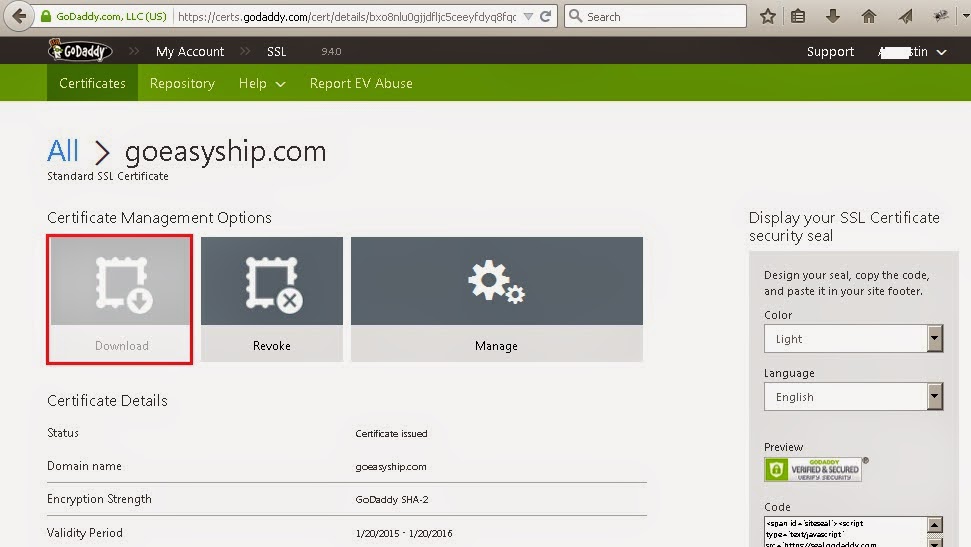
Step 7 - After verification completed, we can see the domain name is issued. Go to "View Status". Here we can see "Download and Manage" options.

Note : Here, Download option is disabled, because by default SSL is activated only for website builder.
We need to activate the Domain Name, for that we have to go to the Server/WHM and generate the "CSR Key" and copy to SSL Control panel.
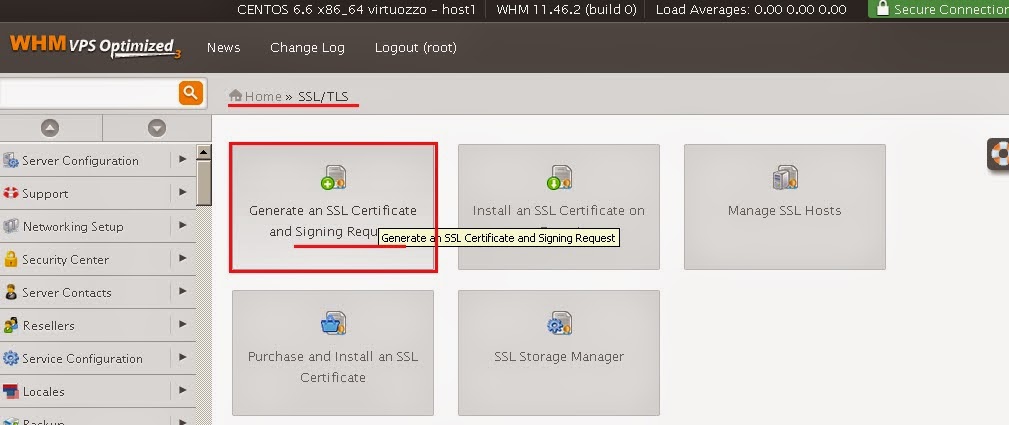
Step 8 - Go to WHM => SSL/TLS => Generate SSL and Signing Request.

While generating SSL, fill all the required fields and click on "Create".
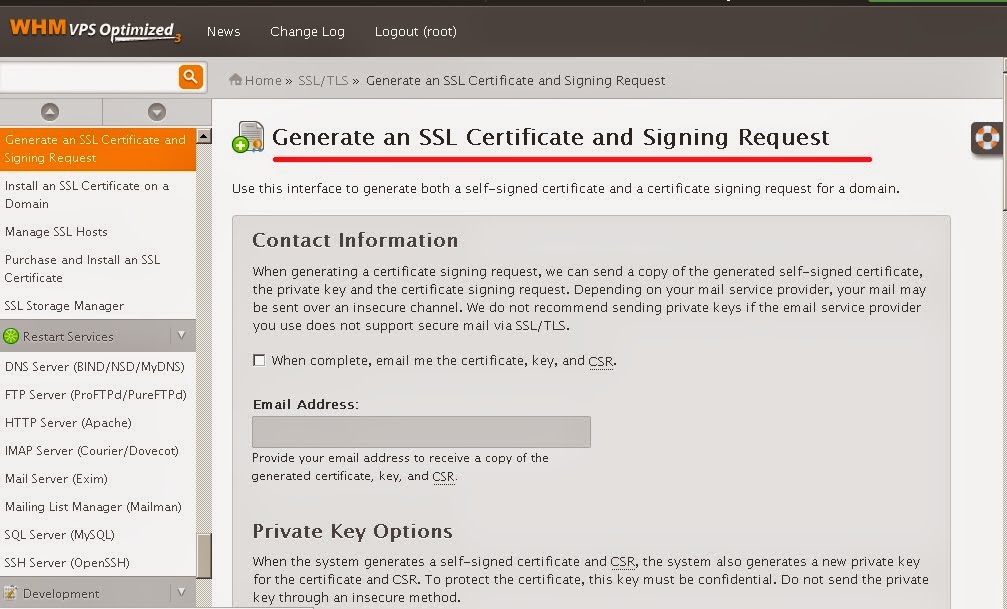


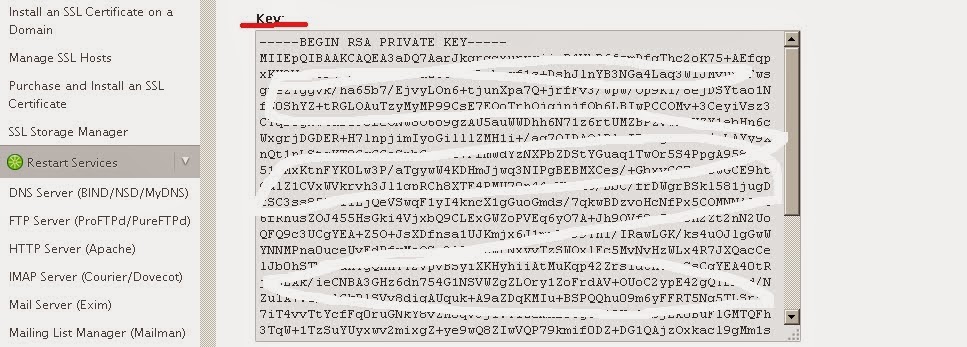
Note : After creating SSL Certificate, we can see the encrypted Key.
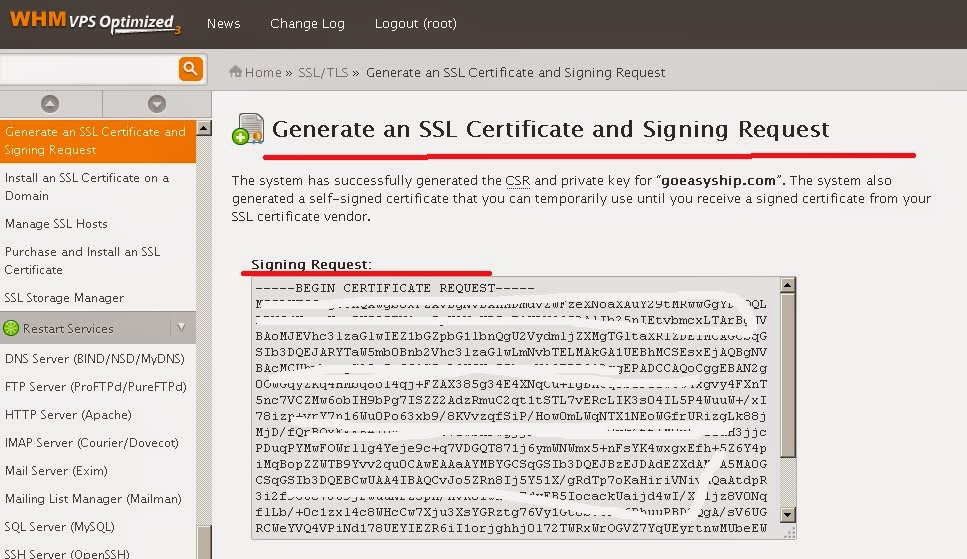

Step 9 - Copy the Signing Request/CSR Key from WHM and Go to godaddy account => SSL => Launch => Manage Certificate => "Re-Key certificate" option and paste the CSR Key and Save

After that we can see the Download option is enabled. Now, we can download CSR Key from godaddy account. Select server type : here I am selecting "WHM/Cpanel/Apache".
Note : We can download CSR Key bundle. Do not delete the key after configuration, save it for future use.

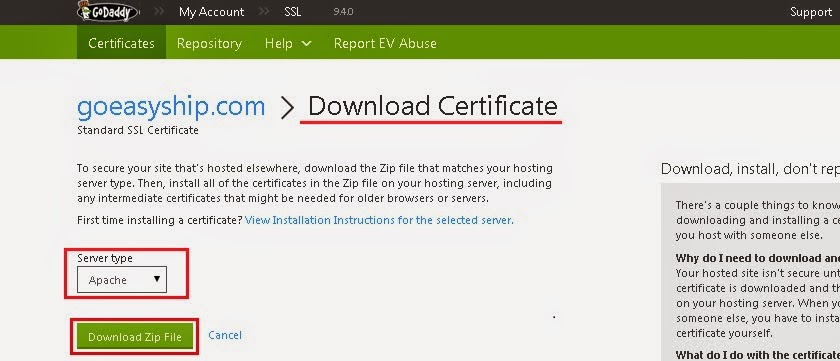

After downloading we can see the CSR Key bundle.

Reference URL => https://support.godaddy.com/help/article/5238/installing-an-ssl-certificate-in-apache-centos?countrysite=in

Step 10 - Now we can check the Domain Name is working in "https:".

Step 11 - Go to the website shown below to check SSL is pointed to Domain Name. Here we can also see all the information related to the SSL.

That's it.....