This recipe uses the IPsec VPN Wizard to provide a group of remote users with secure, encrypted access to the corporate network.
The tunnel provides group members with access to the internal network, but forces them through the FortiGate unit when accessing the Internet. When the tunnel is configured, you will connect using the FortiClient application.

Step 1 - Login into firewall device.
 Note : Also take backup the configuration, for safe purpose.
Step 2 - Check the LAN & WAN details.

Step 3 - Create new local user for accessing VPN.


Step 4 - Create new group and add the newly created user.


Step 5 - Create the address under 'objects' for local LAN segments for accessing Local Network.


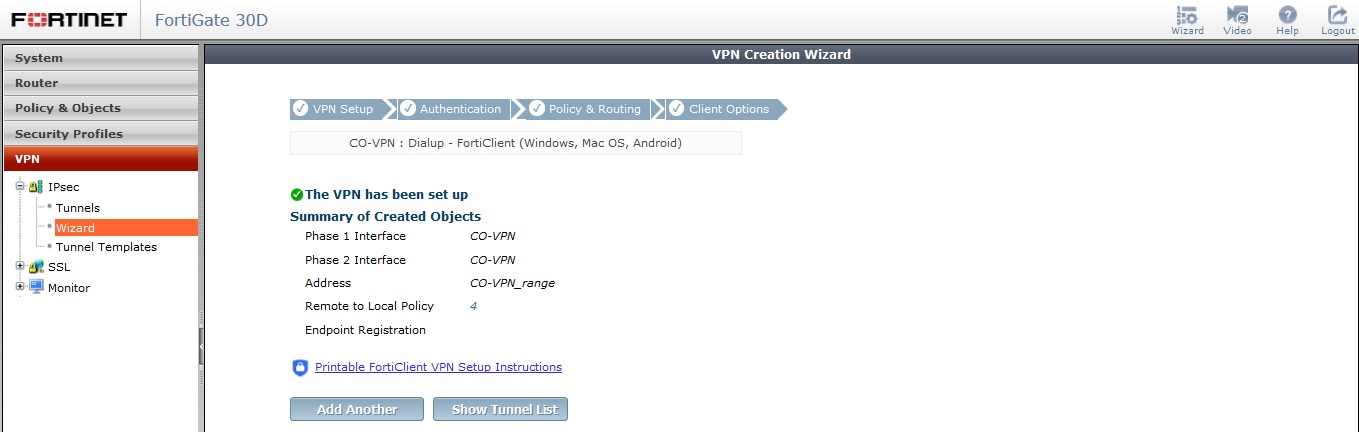
Step 6 - Now start the IPsec VPN configuration.


Step 7 - Check the Objects tab, after creating IPsec-VPN automatically added as the VPN range address.

Step 8 - We can see, automatically added one IPsec VPN interface under the WAN section.

Step 9 - Then create a policy for IPsec-VPN to LAN.

Step 10 - Go to Remote computer and install FortiClient, then configure IPsec VPN and connect with the user credentials.


Step 11 - Check the connectivity using ping command.


Step 12 - We can also monitor the connection status on IPsec monitor section.


That's it...
The tunnel provides group members with access to the internal network, but forces them through the FortiGate unit when accessing the Internet. When the tunnel is configured, you will connect using the FortiClient application.

Step 1 - Login into firewall device.

Step 2 - Check the LAN & WAN details.

Step 3 - Create new local user for accessing VPN.


Step 4 - Create new group and add the newly created user.


Step 5 - Create the address under 'objects' for local LAN segments for accessing Local Network.


Step 6 - Now start the IPsec VPN configuration.


Enter the outgoing interface, address range(IP pool, IP which gets assigned after VPN connected). Enable split tunnel and endpoint registrations.


Step 7 - Check the Objects tab, after creating IPsec-VPN automatically added as the VPN range address.

Step 8 - We can see, automatically added one IPsec VPN interface under the WAN section.

Step 9 - Then create a policy for IPsec-VPN to LAN.

Step 10 - Go to Remote computer and install FortiClient, then configure IPsec VPN and connect with the user credentials.


Step 11 - Check the connectivity using ping command.


Step 12 - We can also monitor the connection status on IPsec monitor section.


That's it...


