I have an account on Amazon Web Service and created Free Tier RHEL 7 Server. We can login to AWS Ec2 Instance using SSH / Putty. ODK Aggregate installation needs some other softwares like Java, Tomcat and MySql.
Step 1 - Check the server details like OS and IP-Address using the command as shown below.
Step 2 - Update the server repository using "yum update" command.
Step 3 - We need to install "JAVA" and we can check whether the java is installed or not in this server using this command.
Step 4 - If not installed, we have to install java / openjdk. Before installation check the java package and version on repository.
java-1.7.0-openjdk - OpenJDK Runtime Environment
java-1.7.0-openjdk-devel - OpenJDK Development Environment
Step 5 - Set the JAVA_HOME environment variable on CentOS/RHEL Linux. The Java SDK package will be installed in “/usr/lib/jvm” directory by default.
Option 1 : We can set the path temporary, by using the below mentioned command. This option will not work after rebooting the server.
[root@ip-172-31-5-97 ~]# export JAVA_HOME=/usr/lib/jvm/java-1.7.0-openjdk-1.7.0.75-2.5.4.2.el7_0.x86_64/
Option 2 : If we need to set the path permanently, open the shell configuration file "$HOME/.bashrc" and at the bottom of the file, type the following line:
export JAVA_HOME=/usr/lib/jvm/java-1.7.0-openjdk-1.7.0.75-2.5.4.2.el7_0.x86_64/
Step 6 - We have successfully installed java/jdk and java environment variable pointed. Now check the version and path.
Step 7 - Install Tomcat web server on this server. In this case ODK Aggregate recommended "Tomcat 6", we can also install Tomcat 7, but we need to add some setting on tomcat 7 configuration file.
Apache Tomcat is a opensource web server product of Apache Foundation like Apache HTTP server. It is used to deploy Java Servlet and JSP applications. To deploy any application in Tomcat, we can simply create a war file and deploy them.
First check the tomcat on repository and also check the version and install tomcat on this server.
Check the Tomcat locations. Restart the Tomcat service and check the status.
Then enable Tomcat service booting time using the command:
[root@ip-172-31-5-97 ~]# systemctl enable tomcat
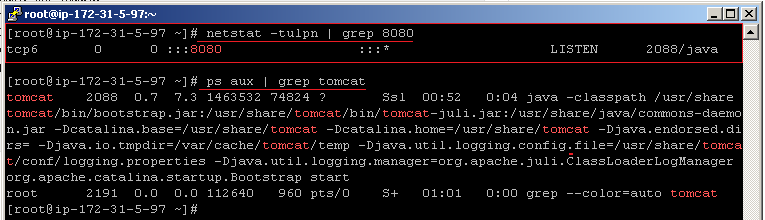
Step 8 - Check the Tomcat service is running by using the command :
Step 9 - Now we need to install mysql-server and mysql on this server. Centos7 comes with MariaDB instead of MySQL. MariaDb is an open source equivalent to MySQL and can be installed with "yum -y install mariadb-server mariadb". If you must have mysql, you need to add the "mysql-community repo" and then you can install MySQLl like you normally do.
[root@ip-172-31-5-97 ~]# wget http://repo.mysql.com/mysql-community-release-el7-5.noarch.rpm
[root@ip-172-31-5-97 ~]# rpm -ivh mysql-community-release-el7-5.noarch.rpm
After installing mysql-community, check the repository directory whether it is added on this server or not.
Now, Mysql-Community is added. Next, we need to update the repository and install mysql.
[root@ip-172-31-5-97 ~]# yum update
After installing, restart the mysql service and check mysql status. Then mysql server enable booting time.
[root@ip-172-31-5-97 ~]# systemctl enable mysqld
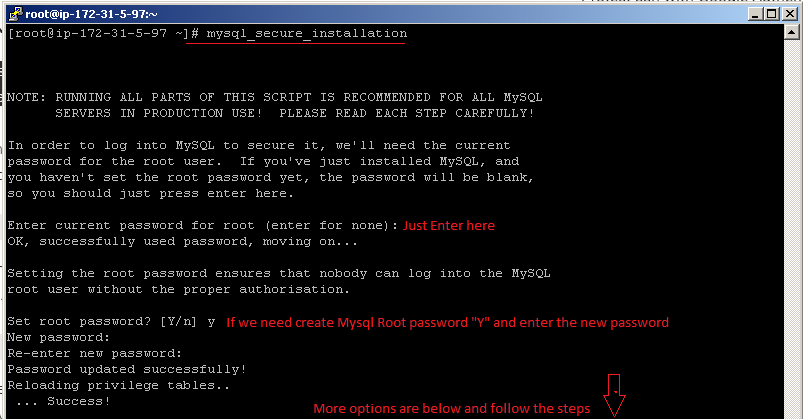
On fresh installation of MySQL Server, the MySQL root user password will be blank. For good security practice, we should reset the password for MySQL root user by using the command :
Remove anonymous users? [Y/n] y
Disallow root login remotely? [Y/n] y
Remove test database and access to it? [Y/n] y
Reload privilege tables now? [Y/n] y
Step 10 - Finally we can check whether mysql server is working or not by login mysql server.
Step 11 - Download and Install ODK Aggregate files. Before downloading you can select 64bit or 32bit according to your choice.
I have already downloaded the ODK Aggregate file on my server. Go to the download directory and extract the file, then provide execute permission on ODK script.
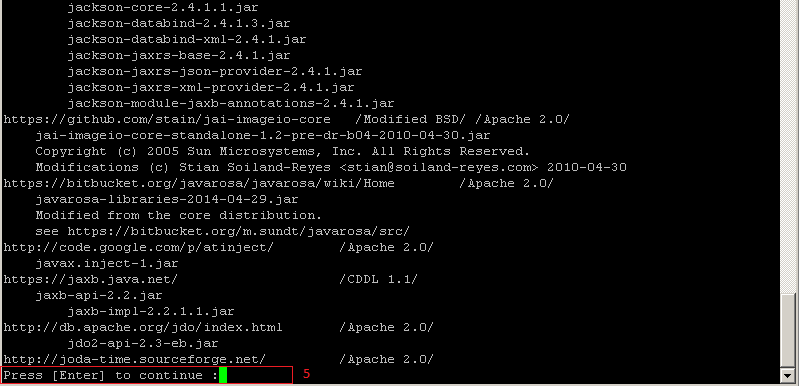
Now we can start the installation, it is a long configuration process.
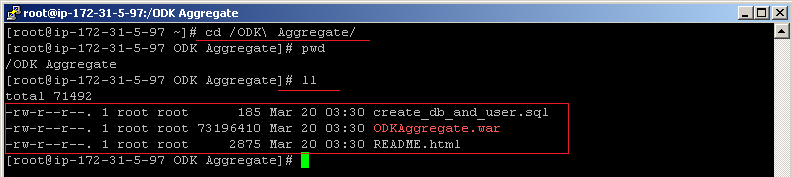
Step 12 - After installing ODK Aggregate, a directory will be created under parent directory "/". Under this directory, we can see ODK Database and ODK war file.
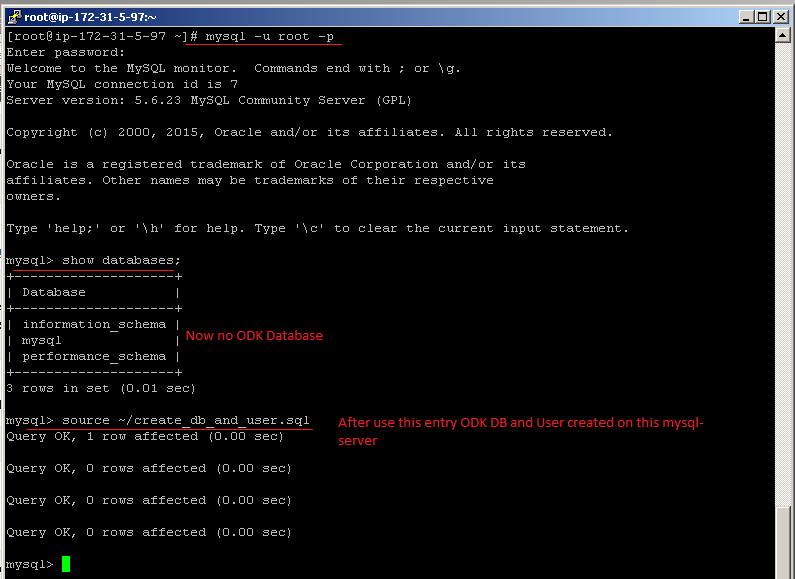
Then we need to create ODK databases on mysql server. At the time of ODK Aggregate installation, DB created on "/ODK\Aggregate/create_db_and_user.sql".
When I created DB in mysql server, I got an error as shown below.
Error :
mysql> source /ODK\ Aggregate/create_db_and_user.sql
ERROR: Failed to open file '/ODK\ Aggregate/create_db_and_user.sql', error: 2
Solution :
Copy "create_db_and_user.sql" to any home directory. Here I have copied to root home directory. 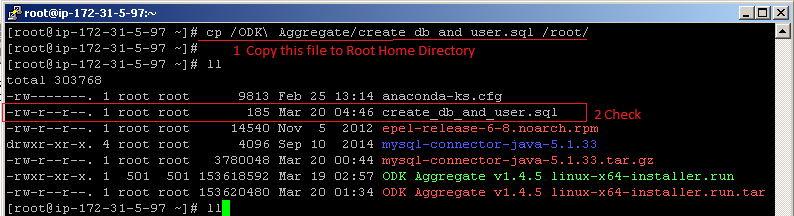 Again run the command on mysq server : "source ~/create_db_and_user.sql". This will automatically create ODK user and Database.
Step 13 - We want to install mysql-connector. Download the mysql Connector/J from the mysql download site (http://dev.mysql.com/downloads/connector/j/)
Unzip the mysql-connector and copy the “mysql-connector-java-5.1.33-bin.jar" file to "/usr/share/tomcat6/lib/" directory.
Note : After installation, we need to open the port on firewall. Here I have enabled in security option of AWS Ec2 Instance. Otherwise we can enable on firewall, which port we need to open.
OR
[root@ip-172-31-5-97 ~]# iptables -I INPUT -p tcp --dport 8o80 -j ACCEPT
[root@ip-172-31-5-97 ~]# iptables -I INPUT -p tcp --dport 80 -j ACCEPT
[root@ip-172-31-5-97 ~]# iptables -I INPUT -p tcp --dport 3306 -j ACCEPT
[root@ip-172-31-5-97 ~]# systemctl iptables res
Step 14 - At the time of installation, it will also created an ODKAggregate.war file. Rename this file to ROOT.war and copy this to /usr/share/tomcat6/webapps/ directory.
We can chek the /usr/share/tomcat6/webapps/ after copying ROOT.war, it will automatically create new directory for "ROOT".
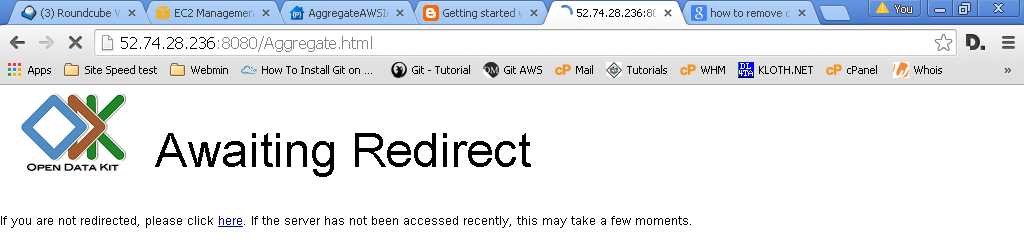
Then check your browser with IP-Address and Port Number (52.74.28.236:8080/ROOT.war), first time you may get blank page. In that case, run again IP-Address:Port number without ROOT.war (52.74.28.236:8080).
Step 15 - Unsupported Webserver Configurations for Tomcat 7. Sometimes we get an error as "Invalid Request".
Tomcat 7, Glassfish and Jetty require additional configuration steps to run ODK Aggregate; we don't support either Tomcat 7 or Glassfish or Jetty. All of these webservers require configuration settings to enable cookies under HTTPS. Otherwise, ODK Aggregate uses no special Tomcat features and it should operate correctly within any compliant Servlet 2.5 web container.
Soltion :
1st - Edit "context.xml" (under Tomcat 7's conf directory /etc/tomcat/) to have the attribute 'useHttpOnly' set to false. I.e.,
[root@ip-172-31-5-97 ~]# vi /etc/tomcat/context.xml
<Context useHttpOnly="false">
<!-- Default set of monitored resources -->
<WatchedResource>WEB-INF/web.xml</WatchedResource>
<!-- Uncomment this to disable session persistence across Tomcat restarts -->
<!--
<Manager pathname="" />
-->
<!-- Uncomment this to enable Comet connection tacking (provides events
on session expiration as well as webapp lifecycle) -->
<!--
<Valve className="org.apache.catalina.valves.CometConnectionManagerValve" />
-->
</Context>
2nd - Then go to /usr/share/tomcat6/webapps/WEB-INF/
Add "glassfish-web.xml" under ODK Aggregate's WEB-INF directory with the content:
<?xml version="1.0" encoding="UTF-8"?>
<glassfish-web-app>
<session-config>
<cookie-properties>
<property name="cookieHttpOnly" value="false" />
</cookie-properties>
</session-config>
</glassfish-web-app>
Add "jetty-web.xml" under ODK Aggregate's WEB-INF directory with the content:
<?xml version="1.0" encoding="ISO-8859-1"?>
<!DOCTYPE Configure PUBLIC "-//Jetty//Configure//EN" "http://www.eclipse.org/jetty/configure.dtd">
<Configure class="org.eclipse.jetty.webapp.WebAppContext">
<Get name="sessionHandler">
<Get name="sessionManager">
<Set name="secureCookies" type="boolean">true</Set>
</Get>
</Get>
</Configure>
[root@ip-172-31-5-97 ~]# systemctl restart tomcat
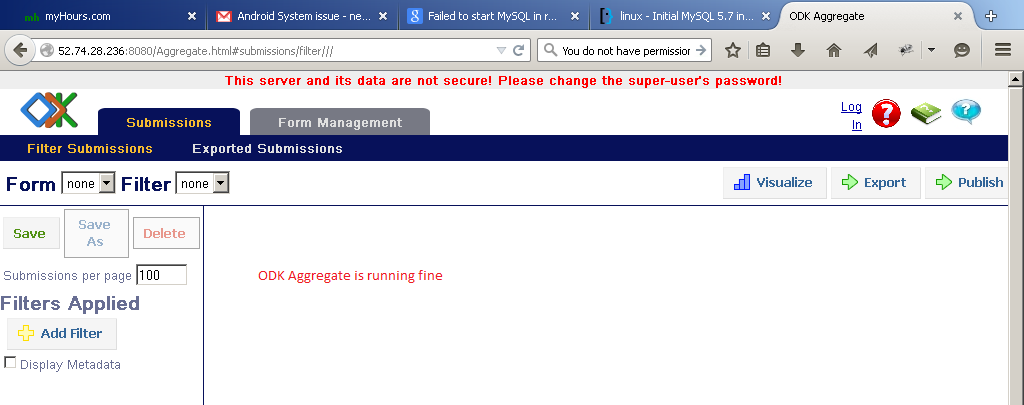
Step 16 - After changing the settings, go to the browser and check ODK Aggregate is working fine.
Here, ODK Aggregate is working fine, Now we can use it, click on Login and create user account and set the permissions.
Note : At fresh login the password will be "aggregate". We can change it afterwards.
That's it....